
Whether setting up a new iPhone, accessing Apple Music, or downloading your first app, having an Apple ID is essential. Your Apple ID is your key to everything in the Apple ecosystem- from iCloud and iMessage to FaceTime and the App Store. In this blog, we’ll walk you through how to create an Apple ID on different devices, explain what you’ll need, and answer some of the most common questions people have when getting started.
When setting up a new iPhone or iPad, Apple will prompt you to create an Apple ID. However, if you skipped that step or want to create a new one, you can do it anytime. In this blog, we will guide you through the simple steps to create an Apple ID, so you can start enjoying all of Apple’s services effortlessly.
What is an Apple ID?
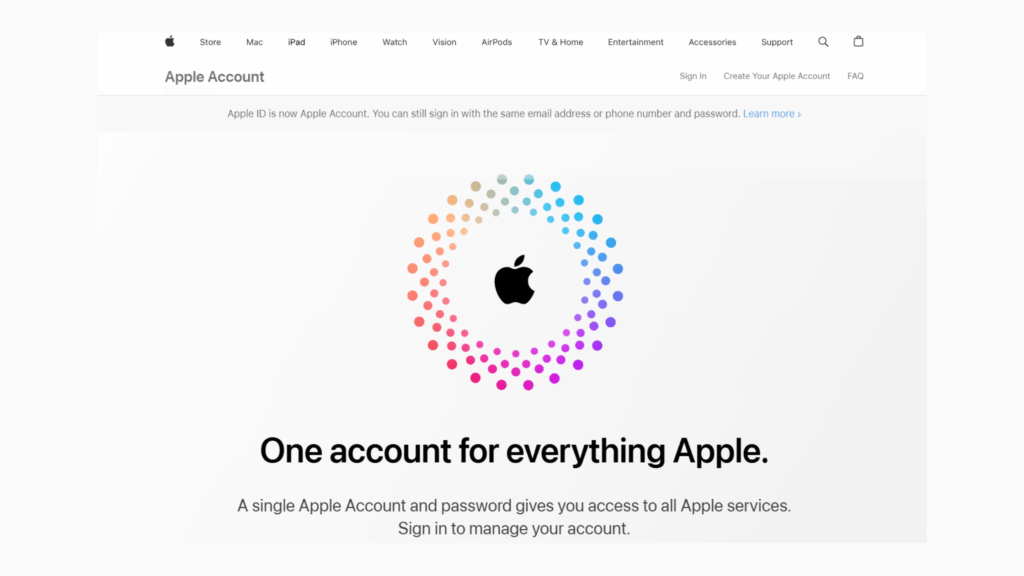
An Apple ID is your personal account that allows you to access and use various Apple services, such as the App Store, iCloud, iTunes, Apple Music, and more. It helps you connect all your Apple devices, like the iPhone, iPad, and Mac, making it easy to sync your data and continue your activities across different devices.
With an Apple ID, you can store and sync important data through iCloud, including contacts, calendars, reminders, and bookmarks. This means you can start a task on one device and continue it on another without losing progress. Your Apple ID also lets you download and purchase apps, games, music, and movies from the App Store and iTunes Store. Additionally, you can use it to buy products directly from the Apple Online Store.
Having an Apple ID is essential because it acts as a digital key that connects all Apple services, making your experience smoother and more convenient. Whether switching between devices or restoring your data, your Apple ID ensures everything stays in sync.
So, if you thought “How do I get a new Apple ID?” you have landed in the right place! In this blog, we will explain how to create a new Apple ID easily.
Steps to Create your Apple Account on iPhone, iPad, or Apple Vision Pro:
You can create an Apple Account when setting up your iPhone, iPad, or Mac, or you can do it later through the App Store.
Creating an Apple Account During Device Setup
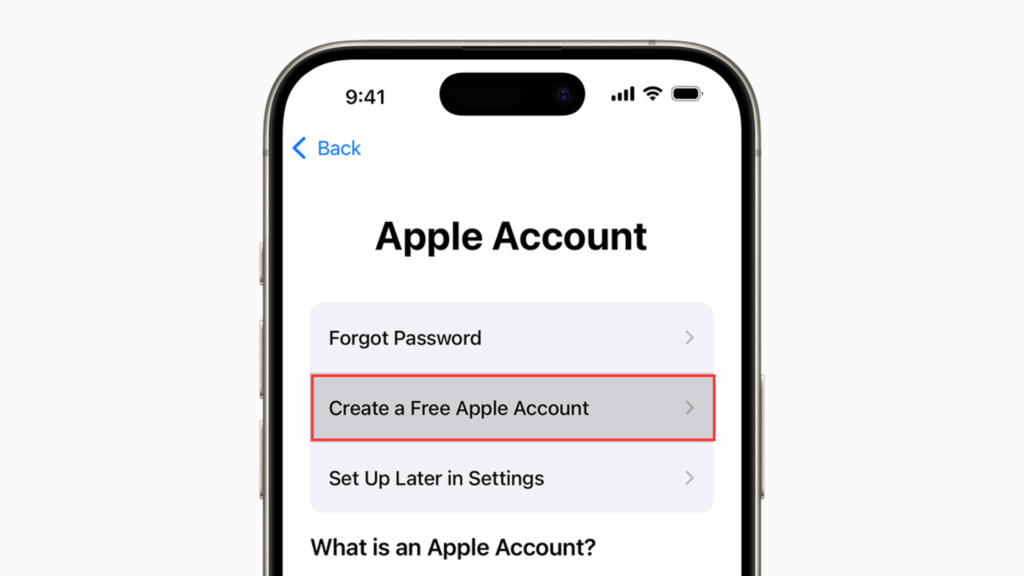
1. When setting up your new device, tap “Forgot password or don’t have an Apple Account?”
2. Select “Create a Free Apple Account.”
3. Enter your name and birthday, then tap Continue.
4. Provide an email address—this will be your Apple ID. If you don’t have an email, you can create a free iCloud email address.
5. Follow the on-screen steps to:
- Verify your email
- Create a strong password
- Select your country or region
- Set up two-factor authentication for added security (this step can be skipped and done later in Settings).
6. Once your email is verified, you can sign in and start using iCloud, the App Store, and other Apple services.
As you use your new Apple Account, Apple may ask for:
- Your phone number – This helps with account recovery and security verification.
- A payment method – You won’t be charged unless you purchase.
By completing these steps, you’ll have full access to Apple’s ecosystem, including downloading apps, syncing data with iCloud, and making secure purchases.
How to Create an Apple ID Using the App Store?
If you didn’t create an Apple ID during device setup, you can do it later through the App Store.
1. Open the App Store on your iPhone, iPad, or Mac.
2. Tap the My Account button (your profile icon).
3. Select “Create New Apple Account.” If this option isn’t available, make sure you’re signed out of iCloud first.
4. Follow the on-screen instructions to:
- Enter an email address (this will be your Apple ID).
- Create a strong password for security.
- Select your country or region.
5. Add a payment method and billing information, then tap Next. You can also choose None if you don’t want to add payment details now. Apple won’t charge you until you make a purchase.
6. Confirm your phone number, which helps with account security and recovery. Tap Next to proceed.
7. Check your email for a verification message from Apple and follow the instructions to verify your email address.
Once you’ve verified your email, your Apple Account will be ready. You can now sign in to the App Store, iCloud, and other Apple services on your device.
Create an Apple ID on a Mac:
If you’re using a Mac and need to create a new Apple Account, follow these simple steps.
1. Choose Apple Menu System settings. Click the Apple menu in the top-left corner of your screen and select System Settings.
2. In the sidebar, click Sign In.
3. Select “Don’t Have an Account?”
4. Follow the on-screen instructions.
5. Enter the required details:
- Your birthday
- An email address (this will be your Apple ID)
- A strong password
- Your country or region
6. Add a payment method and billing information, then click Continue. If you don’t want to add a payment method, select None.
7. Confirm your phone number to help with identity verification and account recovery. Click Next.
8. Check your email for a verification message from Apple and follow the instructions to verify your email address.
Once your email is verified, you can sign in to your Apple Account and use services like iCloud, the App Store, and Apple Music on your Mac.
How to Create a new Apple ID on a MAC?
To create your Apple ID on a Mac, follow these steps:
- Click the Apple icon and then click System Preferences.
2. Tap “Sign In with your Apple ID” from the sidebar.
- Click “Create Apple ID,” then follow the onscreen instructions to provide an email address, create a strong password, and set your device’s region. The email address you provide will become your new Apple ID.
- Enter your credit card and billing information, then tap “Continue.” Alternatively, you can select “None” if you prefer not to add a payment method right away. You won’t be charged until you make a purchase.
- Check your email for a verification message from Apple and verify your email address.
- After verifying your email address, you can use your new Apple ID to sign in to the App Store and other Apple services like iCloud.
Create an Apple ID using the official Apple ID website:
To create an Apple ID via the official Apple ID website, follow these steps:
- Go to the Apple ID website.
2. Click “Create Your Apple ID” at the top-right corner of the page.
4. Add the required details like, your first name, last name, and birthday.
- Check the boxes to subscribe to Apple Updates if you’d like to stay updated on the latest news, software, products, and services from Apple.
- Click “Continue.”
- Follow the on-screen steps to verify your email address and phone number.
You can checkout more information from Apple’s support articles: Click here
Are you a business owner? Have you considered adding your business to Apple Maps? With millions of active users globally, Apple Maps is a powerful tool for connecting with customers. If you’re wondering how to get your business listed on Apple Maps, this brief guide will walk you through the process easily!: Click here to read.
How to Create an Apple ID for Your Child?
Instead of sharing your Apple ID with your child — which can expose personal photos, contacts, and app purchases — it’s safer and smarter to create an Apple ID for your child. This gives them access to essential Apple services like the App Store, iMessage, FaceTime, and iCloud. Apple allows you to set age-appropriate parental controls and manage their device use through Family Sharing.
Can a Child Create Their Own Apple ID?
No — children under 13 (age may vary by region) cannot create an Apple ID on their own. However, if you’re the family organizer or listed as a guardian in Family Sharing, you can set one up for them directly from your device.
Steps to Create an Apple ID for Your Child (on iPhone or iPad)
- Go to Settings > Family.
- Tap the Add Member button.
- Tap Create Child Account, then tap Continue.
- Enter your child’s name and birth date.
- ✅ Be sure to enter the correct birth date — it’s difficult to change later.
- Follow the onscreen steps to set up the Apple ID. You can:
- Use your child’s email address
- Choose a suggested @icloud.com address
- Use a Game Center nickname
- Verify your identity as an adult.
- You may need to use a credit card or, in supported regions, a driver’s license or state ID stored in your Wallet app.
Once the account is created, you can manage parental controls, screen time, app downloads, and more directly from your device using Family Sharing settings.
For more information, refer to Apple Support site: Click here
Apple ID vs. iCloud Account: What’s the Difference?
Many people don’t know the difference between an Apple ID and an iCloud Account because they are closely linked. However, they serve different purposes.
An Apple ID is your main account that lets you sign in and use Apple services like the App Store, iTunes, Apple Music, Apple TV, and more. It acts as your digital identity for buying apps, subscribing to services, and purchasing from the Apple Online Store.
For example, to buy an app, rent a movie, or subscribe to Apple Music, you need an Apple ID.
An iCloud Account is part of Apple’s cloud storage and syncing service. It helps you store and sync your data—such as photos, contacts, emails, and documents—across all your Apple devices.
iCloud includes services like:
- iCloud Drive (for storing files)
- iCloud Photos (to sync photos and videos across devices)
- iCloud Mail (a free email service with @icloud.com)
- Messages in iCloud (syncs your messages across devices)
Every iCloud Account is automatically an Apple ID, but not every Apple ID has to use iCloud.
For example, you can have an Apple ID to download apps from the App Store without using iCloud storage. But if you want to sync your data across devices, you need to sign in to iCloud using the same Apple ID.
Apple ID vs. iCloud Account: What’s the Difference?
Many Apple users get confused between an Apple ID and an iCloud account, especially since they are closely connected and often used interchangeably. However, they serve different purposes within Apple’s ecosystem. Let’s break it down.
✅ What is an Apple ID?
Think of your Apple ID as your main digital identity for everything Apple. It’s the account you use to:
- Sign in to Apple services like the App Store, iTunes, Apple Music, Apple TV, and Apple Books
- Buy apps, games, music, movies, and more
- Track your device with Find My
- Manage your Apple devices from one place
- Access your Apple Store purchases and subscriptions
Use any email address (like Gmail, Outlook, or Yahoo) to create an Apple ID. For example, [email protected] can be your Apple ID.
✅ What is an iCloud Account?
An iCloud account is a part of your Apple ID — it’s the service that handles your cloud-based storage and syncing.
With iCloud, you can:
- Sync photos, contacts, calendars, and files across devices
- Use iCloud Drive to store documents
- Use your @icloud.com email address
- Access Messages in iCloud, Safari tabs, iCloud Keychain, etc.
- Back up your iPhone or iPad automatically.
To use iCloud services, you must be signed in with your Apple ID and activate iCloud features under settings.
So, What’s the Relationship Between the Two?
- Every iCloud account is tied to an Apple ID.
- But, not every Apple ID is used for iCloud (you can choose not to use iCloud features).
- If you create a new Apple ID using an @icloud.com email, your Apple ID and iCloud account are essentially the same login.
📌FAQs: Creating an Apple ID
1. How do I create an Apple ID?
To create an Apple ID, go to the Apple website or use your iPhone, iPad, or Mac. On your device, open Settings and tap “Sign in to your iPhone” (or iPad), then choose “Don’t have an Apple ID?” and follow the prompts. Then, enter your name, email address, password, and a few security questions to complete the process.
2. How do I create a new Apple ID?
You can create a new Apple ID by visiting appleid.apple.com or during the setup process on a new Apple device. Select “Create Your Apple ID” and fill out the required details, including your email address (which becomes your Apple ID), password, and security information.
3. Can I create an Apple ID using Gmail?
Yes, you can create an Apple ID using any valid email address, including Gmail. When signing up, enter your Gmail address instead of choosing an @icloud.com address. This Gmail address will become your Apple ID login.
4. How can I create an Apple ID on an iPhone?
To create an Apple ID directly on your iPhone:
- Open the Settings app.
- Tap Sign in to your iPhone.
- Choose Don’t have an Apple ID or forgot it?
- Tap Create Apple ID, then follow the on-screen instructions.
Make sure you’re connected to Wi-Fi and have your personal information ready.
5. How can I create an Apple ID for my child?
To create an Apple ID for your child, go to Settings > [your name] > Family Sharing, then tap Add Member > Create Child Account. Apple requires parental consent, and you’ll need to verify your identity and agree to child account settings and restrictions.
6. How can I create an Apple ID without a phone number?
While Apple generally requires a phone number for verification, you may be able to create an Apple ID without one by choosing to verify using email instead, especially when signing up via the Apple website. However, some features like two-factor authentication will be limited or unavailable without a phone number.
Absolutely! Here are additional FAQs for your blog “How to Create an Apple ID”, keeping the tone informative and incorporating relevant keywords where appropriate:
7. Can I have more than one Apple ID?
Yes, you can create and use multiple Apple IDs. However, Apple recommends using a single Apple ID for all Apple services to avoid confusion and data syncing issues across devices.
8. Is it free to create an Apple ID?
Yes, creating an Apple ID is completely free. There are no charges to sign up, and you don’t need to add a payment method unless you plan to purchase from the App Store or iTunes.
9. What email can I use to create an Apple ID?
You can use any valid email address to create an Apple ID, such as Gmail, Yahoo, Outlook, or a custom domain. You can also get a free @icloud.com email when you set up your iCloud account.
10. Do I need an iPhone to create an Apple ID?
No, you don’t need an iPhone to create an Apple ID. You can sign up on any Apple device (like iPad or Mac), or through a web browser by visiting appleid.apple.com.
11. How do I verify my Apple ID?
After creating your Apple ID, Apple will send a verification email to the address you used. Open the email and click the link to verify. If you add a phone number, a verification code will be sent via SMS for additional security.
12. What if I forgot my Apple ID or password?
Go to iforgot.apple.com and follow the prompts to recover your Apple ID or reset your password. You’ll need access to the email address or phone number linked to your account.
13. Can I create an Apple ID for my business?
Apple IDs are generally designed for individual use. However, businesses can create separate Apple IDs for managing devices or purchasing apps through Apple Business Manager. A business-specific ID can help keep things organized if you manage multiple devices.
14. How long does it take to create an Apple ID?
Creating an Apple ID takes just a few minutes. Once you fill in your details and verify your email and phone number, your account is ready to use immediately.
15. Can I create an Apple ID without a credit card?
Yes, Apple allows you to skip entering payment details when you create an Apple ID. Simply choose “None” when asked for a payment method, especially if you only plan to use free apps or services.


0 Comments