
In one of our previous blogs, we explained how important it is to add your business to Google Business & walked you through how to set up a Google Business profile. Click here to read that blog!
Anyway, this blog is not about “Google (aka the most used search engine in the world” In this blog, we thought to share about Bing Places for Business & how to add your business to Bing. Even though Google is the most popular search engine in the world, Bing also has a significant place as a search engine.
So, if you are a small business owner who wants to upgrade your online presence on Bing Search results, you could use this free online business listing platform, Bing Places for Business.
Bing Places for Business: Introduction to Bing Business listing
Bing Places for Business is Microsoft’s version of Google Business Profile, allowing businesses to appear in Bing search results and on Bing Maps. Bing Places for Business website is a free business listing on Bing that helps businesses gain more visibility online. When you list your business, your profile may show up at the top or right side of Bing’s search results, making it easier for potential customers to find your business.
When you claim your listing and verify your business, you can provide essential business details, such as your address, contact details, website, and operating hours. Microsoft introduced Bing Places for Business in 2009 and has continuously improved it by adding features like high-quality images, videos, and customer reviews.
A well-optimized Bing Business listing helps improve your local SEO, making your local business more visible to customers searching for relevant products and services. If you’re a business owner, setting up a business listing on Bing Places for business is a great way to expand your reach beyond Google and attract more potential customers.
How to add your business to Bing?
Follow these steps to list your business on Bing.
1.Create or Sign in to a Microsoft Account.
Go to the Bing Places for Business website, and then, if you already have a Microsoft account, you can sign in to it by clicking the “Existing user” option.
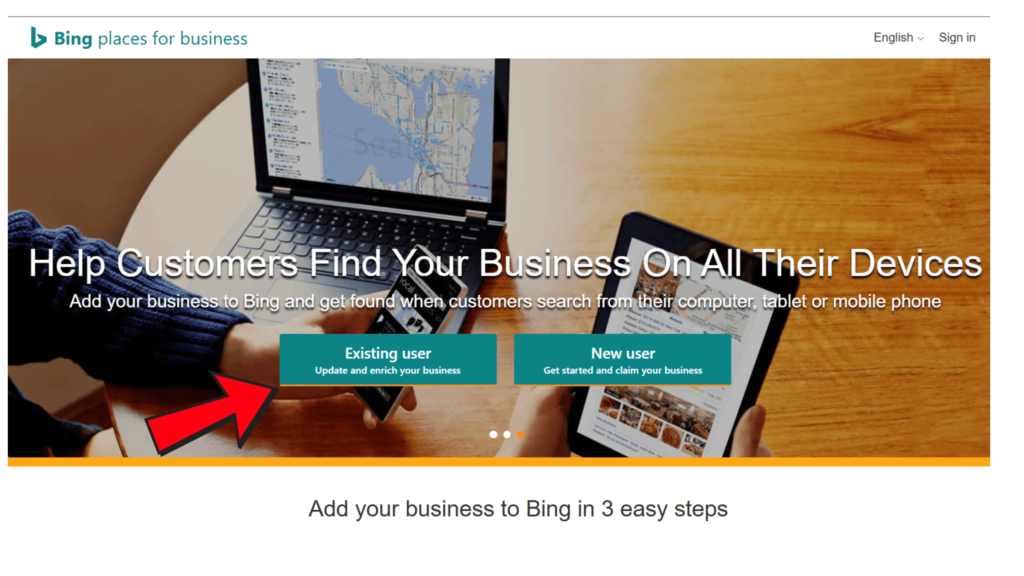
If you don’t have an account or want to create a new account for your business, click “New user” instead.
You will be prompted to select an email address and password before completing a brief CAPTCHA test. Then, Bing will send you a verification code. After confirming your sign-up with the provided code, proceed to the next step.
2.Claim or create your Business Listing.
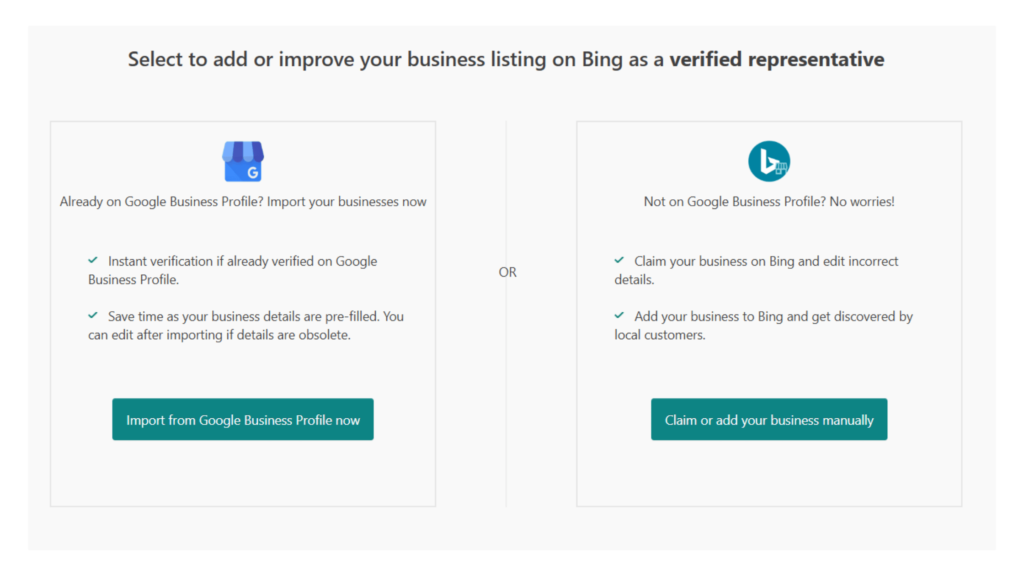
Bing provides two options for creating a business listing. You can import information from an existing Google Business Profile listing or claim or add your business manually.
How to import from Google My Business:
If you already have a Google Business Profile, click the “Import from Google My Business now” button to bring in your existing listing from Google. Select the Google account associated with your business profile.

Next, choose the specific business you wish to import if you have multiple businesses. Then, click “Continue.”
Bing for Business will automatically replicate the information from your Google listing. Instant verification will be granted if your listing is already verified on Google Business Profile.
How to claim or add your business manually:
To manually set up a business listing on Bing, select your business type and location from the drop-down menus. Then, use the search box that appears to input your basic business details. Search for your business here
Bing will display any listings that match the details you entered. If you find your business among them, click “Claim business.” If not, click “Create new business.”
When creating listings for a chain business with over 10 locations, start by entering your business’s name, website address, and the number of locations you’re including. On the following screen, input specific details for each location.
3.Complete your Business listing information
The next step involves optimizing your listing by providing contact details and other details.
Use the on-screen text fields and drop-down menus to add:
- Business name
- Address and Phone number
- Website address
- Business segment (industry sector)
- Up to 10 categories (business activities)
- Description
- Social media profiles
- Up to 100 photos of your business
- Links to other directory profiles (e.g., Yelp)
- Hours of operation
Most of the business details you input will appear on your final listing. Ensure the information is both accurate and complete. Providing all the necessary details helps searchers take their next steps, like contacting you or finding your products.
Additionally, include as many high-quality photos as you can. It enhances your listing’s visibility and helps searchers find what they need more efficiently.
4.Verify your listing
Last step is verifying your listing. You’ll need to complete a verification step to confirm that the listed business belongs to you. In simple terms, you have to prove that you are the business owner.
Depending on the information you provide, you can verify your account by:
- Entering a PIN received through a call or SMS to your registered business phone number.
- Verify your account through an email sent within 15 minutes of your verification request.
- Answer a set of questions from Bing.
- Entering a PIN received through a postcard sent to your business address (this may take up to 12 days).
Once you’ve successfully verified your account, your listing will be visible to potential customers on local search results.
Benefits of Using Bing for Businesses
If your goal is to improve your local search result rankings, Bing business lising is not an option, it is a MUST! Adding your business to Bing provides exciting benefits that can significantly boost your visibility.
According to a study by Statista, Bing is the second most used search engine, with an 8.23% market share.
Even though Google is the most popular & most used search engine, there are a considerable amount of people who use Bing as a search engine. Bing is seamlessly integrated into Microsoft Edge browsers, making it a commonly used search engine for many individuals who may not be aware of it.
And using Bing listings is entirely cost-free. Creating a Bing business listing require no expenses except for the time you invest in the process.
Even if you’re not the most technically savvy business owner, you will discover it relatively simple to create and manage your account.
Lastly, Bing Places serves as another valuable data source for your business. Its user-friendly analytics dashboard allows you to track the number of impressions, clicks and reviews your business receives.
With all these incredible benefits, there is no reason for you to ignore adding your business to Bing business listing.
Tips to optimize your Bing Business Listing
Setting a listing on Bing Places for Business can enhance your business’s online visibility. However, to maximize the benefits of your listing, optimization is crucial. Follow the steps below to impact the ranking of your listing in Bing Search and Maps results, attracting more interest from searchers.
1.Perform a keyword research
Keyword research is the process you follow to find out what your potential customers search online. If you know what your customers are looking for, you can use those words to optimize your Bing Business listing and get a higher rank in search results.
For example, if you own a bakery in Melbourne, you want your listing to appear at higher ranks when people search for “Bakeries in Melbourne.”
For that, you need to make your business listing more relevant to your potential customers.
Enhance the relevance of your listing by incorporating keywords that Bing considers significant to the query you aim to rank for. Begin by identifying the proper keywords to include in your Bing business listings.
Once you have compiled your list, adjust your Bing Places for Business listing title and description by including the keywords you have identified.
The Microsoft Advertising Keyword Planner can help you do keyword research and identify the most effective keywords.
2.Check NAP accuracy
NAP stands for name, address, and phone number.
Ensure that your NAP details are identical across all online directories (e.g., Yelp, Google Business Profile, etc.). Search engines like Bing gather information about your business from external sources, whether accurate or not.
Consistent NAP information simplifies the process for searchers to find accurate details about your business.
Using different phone numbers across various online listings and your website creates confusion for searchers unsure which number to call.
Maintaining consistency involves checking each online directory individually. However, you might not be aware of all your listings, as many directories automatically generate listings from online information.
3.Add high-quality images
Images play a significant role in Bing Search Engine Results Pages (SERPs). Including high-quality images that highlight your business and products can greatly enhance the effectiveness of your listing.
Selecting the appropriate images enhances the visual appeal of your listing in Bing local listing results, encouraging more clicks to your website.
An impressive image gallery can also improve the utility of your listing by showcasing your storefront, products, and other aspects of your business.
4.Earning reviews
Local businesses heavily depend on reviews as they play a crucial role in helping individuals decide whether or not to visit a business. Earning reviews about your business is essential in this context.
Reviews contribute to the credibility of your company. It’s not necessary to have solely positive reviews, as an absence of negative reviews or average experiences may raise suspicions. It’s beneficial to gather a variety of reviews so that individuals can form their own opinions about your business.
The most effective way to garner reviews is by politely asking people to rate their experience at your business. Avoid pressuring them but provide an opportunity for them to share their experiences. Instead of compelling positive reviews, encourage them to honestly express their thoughts.
This approach aids your local business in acquiring genuine reviews, thereby enhancing credibility and attracting more people to choose your Bing local listing.
Bing Places for Business vs Google Business Profile
Google dominates the search engine market, but Bing shouldn’t be ignored—around 1.1 billion people worldwide use it as their primary search engine.
Bing Places for Business and Google Business Profile has the same purpose: helping users find relevant search results and providing potential customers with key business details like location, services, and contact information.
These platforms offer similar features, including:
✔ Free business listing management
✔ Customer reviews and ratings
✔ Social media integration
✔ Location-based services via Bing Maps and Google Maps
Since claiming your business is free on both search engines, it’s smart to list on both platforms. Doing so increases your local SEO and ensures maximum visibility to potential customers searching online.
Here’s a comparison between the two:
Integration:
– Google Business Profile: Seamlessly integrates with Google Search and Google Maps, providing significant visibility due to Google’s dominance in online searches.
– Bing Listing: Integrates with Bing Search and Bing Maps, appealing to users who prefer Microsoft’s search engine.
User Base:
– Google Business Profile: Widely used globally, with a vast user base relying on Google for search.
– Bing listing: Appeals to users who prefer Bing, which may have a smaller user base compared to Google.
Verification process:
-Google Business Profile: Typically involves postcard verification or phone verification, ensuring the accuracy of business information.
– Bing listing: Offers multiple verification options, including phone verification, email verification, and postcard verification.
Features:
– Google Business Profile: Provides a range of features, including the ability to add posts, respond to reviews, and showcase products and services.
– Bing listing: Offers features such as adding photos, responding to reviews, and providing detailed business information.
Analytics:
– Google Business Profile: Offers detailed insights into customer interactions, website visits, and other metrics.
– Bing Listing: Provides an analytics dashboard, allowing businesses to track impressions, clicks, and reviews.
Local SEO Impact:
– Google Business Profile: Crucial for local SEO, as a well-optimized profile can improve search rankings on Google.
– Bing Places: Similarly impacts local SEO on Bing, particularly for users who prefer the Bing search engine.
Market Share:
– Google Business Profile: Dominates the search engine market globally with a significantly larger market share.
– Bing listing: Appeals to users who specifically use Bing, representing a smaller market share compared to Google.
Let us help you optimize Bing local listings!
Looking to extend your local business’s reach? Optimizing your Bing local listing is key. Creating a standout listing takes time and effort. Here at DigiFix, we are experts at making your Bing listing a lead-generating powerhouse for your local business.
As a full-service digital marketing firm, we specialize in fine-tuning Bing local listings and Google Business profiles. Let us boost your online visibility and drive success for your business!
Contact us for a FREE 1st consultation
0 Comments